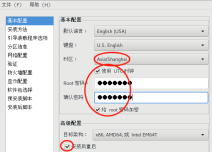
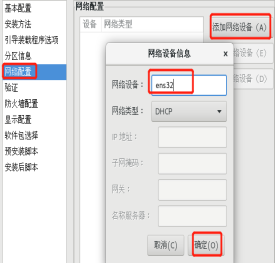
①:網絡適配器模式都需相同
②:在虛擬網絡編輯器中取消DHCP勾選服務
③:在環境中配置本地yum源
④:dhcp是用來分配IP來獲取pxe上共享的文件
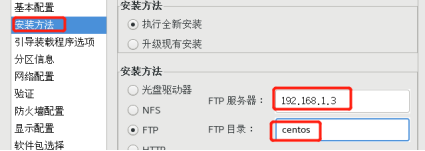
⑤:使用ftp傳輸(ftp傳輸需要客戶端的應答因此需要tftp)
⑥:tftp是一種更加便捷的傳輸,在傳輸過程中不需要對方回應(使用的是UDP傳輸‘QQ、微信就是使用的這種協議’)
⑦:xinetd是tftp的守護進程,端口為69
[root@localhost ~]# yum -y install dhcp vsftpd tftp-server xinetd syslinux                首先下載所需服務
[root@localhost ~]# cp /usr/share/doc/dhcp-4.2.5/dhcpd.conf.example /etc/dhcp/dhcpd.conf  把dhcp的模板拷貝一份
cp:是否覆蓋"/etc/dhcp/dhcpd.conf"? y
[root@localhost ~]# vim /etc/dhcp/dhcpd.conf                                              詳細配置請看1
[root@localhost ~]# mkdir -p /var/ftp/redhat                                              創建一個ftp傳輸鏡像庫
[root@localhost ~]# mount --bind /yum/ /var/ftp/redhat/                                   把鏡像綁定到倉庫
[root@localhost ~]# mkdir -p /tftpboot/pxelinux.cfg                                       遞歸創建兩個目錄
[root@localhost ~]# \cp -a /yum/isolinux/* /tftpboot/                                     遞歸拷貝并保持屬性不變
[root@localhost ~]# \cp -a /usr/share/syslinux/pxelinux.0 /tftpboot/                      拷貝執行文件
[root@localhost ~]# mv /tftpboot/isolinux.cfg /tftpboot/pxelinux.cfg/default              移動配置文件并改名
[root@localhost ~]# vim /tftpboot/pxelinux.cfg/default                                    修改配置文件,詳情2
[root@localhost ~]# vim /etc/xinetd.d/tftp                                                修改tftp配置文件詳情3
[root@localhost ~]# yum -y install system-config-kickstart.noarch                         使用KS生成ks.cfg文件
[root@localhost ~]# system-config-kickstart
[root@localhost ~]# vim anaconda-ks.cfg                                                   從其中復制安裝時所需安裝哪些包
[root@localhost ~]# vim ks.cfg  寫入
[root@localhost ~]# cp ks.cfg /var/ftp/ks.cfg                                             拷貝到指定目錄下
[root@localhost ~]# systemctl restart dhcpd                      啟動
[root@localhost ~]# systemctl restart vsftpd                     啟動
[root@localhost ~]# systemctl restart xinetd                     啟動
[root@localhost ~]# firewall-cmd --add-port=69/udp
success                                                          放行端口
[root@localhost ~]# firewall-cmd --reload
success                                                          重新識別
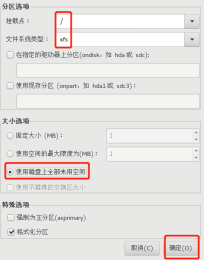
subnet 192.168.1.0 netmask 255.255.255.0 {option routers 192.168.1.2;range 192.168.1.101 192.168.1.166;next-server 192.168.1.100;filename "pxelinux.0";
}                    租約時間也要修改

timeout 6  設置超時時間越小等待時間越短,以毫秒為單位
label linux Redhatmenu label ^Install Red Hat SZDmenu defaultkernel vmlinuzappend initrd=initrd.img ks=ftp://192.168.1.100/ks.cfg quiet需要刪除與上面一起的下一個label或者在initrd.img后面添加inst.stage2=ftp://192.168.1.100  后才能識別append initrd=initrd.img  inst.stage2=ftp://192.168.1.100ks=ftp://192.168.1.100/ks.cfg quiet   不按上述操作會出現Warning:dracut-initqueue timeout - starting timeout scripts
分布式微服務架構。

PXE-E32: TFTP
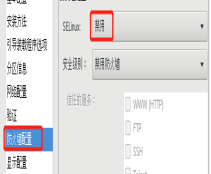
問題所在防火墻沙盒權限問題


版权声明:本站所有资料均为网友推荐收集整理而来,仅供学习和研究交流使用。

工作时间:8:00-18:00
客服电话
电子邮件
admin@qq.com
扫码二维码
获取最新动态