上一節:SpringBoot日記本系統全程直播02:登錄頁面搞起來撒~~
大家好,我是今天晚上的主講老師,我是兔哥。
Springboot項目。上一講,我們學習了登錄和注冊頁面,以及Controller訪問頁面的方法,還有如何處理靜態資源。
今天我們繼續來學習SpringBoot日記本系統,任務是進行后臺的對接。就是說,用戶注冊和登錄的功能,需要完善起來啦。還會涉及到很多企業級開發技術哦。
總之,這一節的內容非常之多,也比較豐富。視頻我后期會補上,如果跟著做做不出來,一定要下載源碼慢慢比對哈。
ok,那么我們現在開整!
目錄
1.數據庫建表
1.1 為什么不用UUID?
1.2 假如以后分庫分表,ID重復怎么辦?
2. 登錄/注冊頁面訪問后臺
3.后端準備工作
3.1 系統核心包
3.1.1?BizException 業務異常類
3.1.2?GlobalExceptionHandler 全局異常處理
3.1.3?ExceptionCodeEnum?通用異常枚舉
3.1.4?CommonResponseDataAdvice 統一封賬響應結果
3.1.5?IgnoreCosmoResult 忽略統一結果返回封裝
3.2 用戶類和mybatisplus引入
3.3 redis引入(為了ID自增)
4. sa-token 鑒權框架
5. 用戶接口和服務類
6. 如何下載源碼?
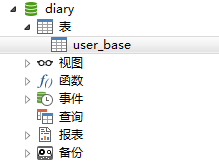
navicat大家應該都有吧,或者類似的軟件也可以,創建一個數據庫,名字叫diary。
然后創建用戶表:
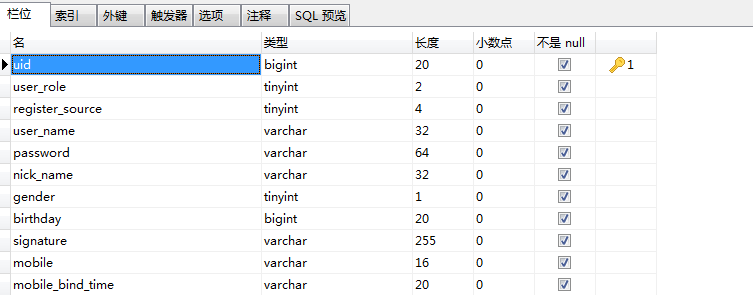
CREATE TABLE `user_base` (
`uid`  bigint(20) NOT NULL COMMENT '用戶ID' ,
`user_role`  tinyint(2) UNSIGNED NOT NULL DEFAULT 1 ,
`register_source`  tinyint(4) UNSIGNED NOT NULL DEFAULT 0 COMMENT '注冊來源:1手機號 2郵箱 3用戶名 4qq 5微信 6騰訊微博 7新浪微博' ,
`user_name`  varchar(32) CHARACTER SET utf8mb4 COLLATE utf8mb4_general_ci NOT NULL DEFAULT '' COMMENT '用戶賬號,必須唯一' ,
`password`  varchar(64) CHARACTER SET utf8mb4 COLLATE utf8mb4_general_ci NOT NULL DEFAULT '' COMMENT '密碼' ,
`nick_name`  varchar(32) CHARACTER SET utf8mb4 COLLATE utf8mb4_general_ci NOT NULL DEFAULT '' COMMENT '用戶昵稱' ,
`gender`  tinyint(1) UNSIGNED NOT NULL DEFAULT 0 COMMENT '用戶性別 0-female 1-male' ,
`birthday`  bigint(20) UNSIGNED NOT NULL DEFAULT 0 COMMENT '用戶生日' ,
`signature`  varchar(255) CHARACTER SET utf8mb4 COLLATE utf8mb4_general_ci NOT NULL DEFAULT '' COMMENT '用戶個人簽名' ,
`mobile`  varchar(16) CHARACTER SET utf8mb4 COLLATE utf8mb4_general_ci NOT NULL DEFAULT '' COMMENT '手機號碼(唯一)' ,
`mobile_bind_time`  varchar(20) CHARACTER SET utf8mb4 COLLATE utf8mb4_general_ci NOT NULL DEFAULT '0' COMMENT '手機號碼綁定時間' ,
`email`  varchar(100) CHARACTER SET utf8mb4 COLLATE utf8mb4_general_ci NOT NULL DEFAULT '' COMMENT '郵箱(唯一)' ,
`email_bind_time`  varchar(20) CHARACTER SET utf8mb4 COLLATE utf8mb4_general_ci NOT NULL DEFAULT '0' COMMENT '郵箱綁定時間' ,
`face`  varchar(255) CHARACTER SET utf8mb4 COLLATE utf8mb4_general_ci NOT NULL DEFAULT '' COMMENT '頭像' ,
`face200`  varchar(255) CHARACTER SET utf8mb4 COLLATE utf8mb4_general_ci NOT NULL DEFAULT '' COMMENT '頭像 200x200x80' ,
`srcface`  varchar(255) CHARACTER SET utf8mb4 COLLATE utf8mb4_general_ci NOT NULL DEFAULT '' COMMENT '原圖頭像' ,
`create_time`  varchar(20) CHARACTER SET utf8mb4 COLLATE utf8mb4_general_ci NOT NULL COMMENT '創建時間' ,
`update_time`  varchar(20) CHARACTER SET utf8mb4 COLLATE utf8mb4_general_ci NOT NULL COMMENT '修改時間' ,
PRIMARY KEY (`uid`)
)
ENGINE=InnoDB
DEFAULT CHARACTER SET=utf8mb4 COLLATE=utf8mb4_general_ci
COMMENT='用戶基礎信息表'
ROW_FORMAT=COMPACT
;
把上面的sql拖到navicat中執行,建表成功。
?
關于UID,我們用bigint類型。
因為UUID是看不出順序的,我們用int類型可以看出用戶創建的先后順序。
我們知道mysql沒有sequence,字段不是自增的。如果用自增長ID,分庫分表的話,很難保證ID不重復和連續。因此,我們可以采用redis的ID自增長策略,這樣不管你有幾個數據庫,只要redis是一個,就沒問題啦。(本節后面會給出具體的方案)
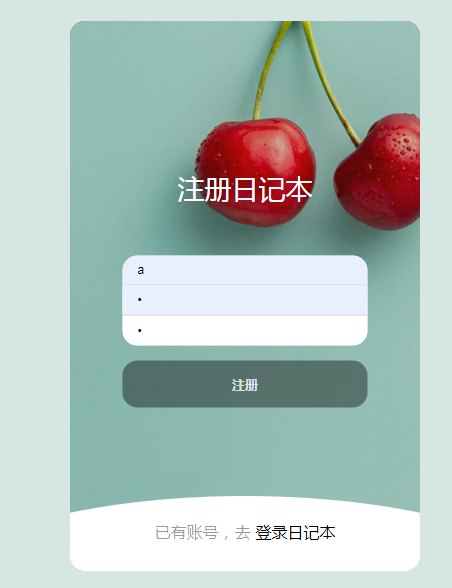
回顧下注冊頁面
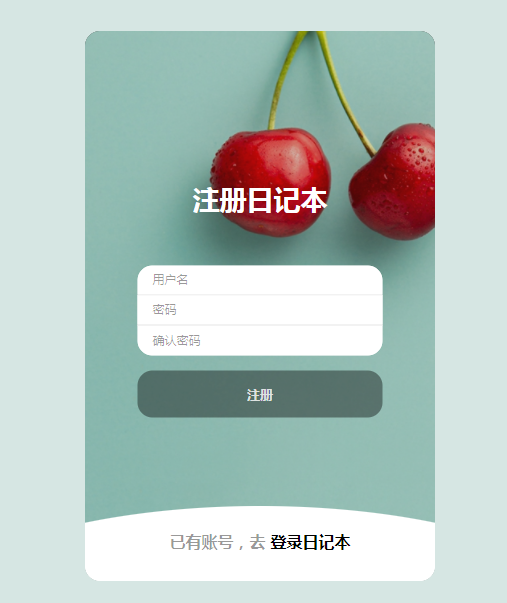
這一步,我們需要對接后臺的登錄注冊接口。
引入vue,axios
<script src="${basePath}/js/vue.js"></script>
<script src="${basePath}/js/axios.min.js"></script>
?更改HTML
<div class="container" id="app"><div class="register-box"><h2 class="register-title"><span>沒有賬號,去</span>注冊日記本</h2><div class="input-box"><input type="text" v-model="userName1" placeholder="用戶名" autocomplete="off"><input type="password" v-model="password1" placeholder="密碼" autocomplete="off"><input type="password" v-model="password11" placeholder="確認密碼" autocomplete="off"></div><button @click="reg">注冊</button></div><div class="login-box slide-up"><div class="center"><h2 class="login-title"><span>已有賬號,去</span>登錄日記本</h2><div class="input-box"><input type="text" v-model="userName2" placeholder="用戶名" autocomplete="off"><input type="password" v-model="password2" placeholder="密碼" autocomplete="off"></div><button @click="login">登錄</button></div></div>
</div>
其實用jquery是完全可以的,不過現在jq基本沒人用了,于是本項目我們也趕一下潮流吧。
vue代碼:
let vue = new Vue({el:'#app',data: {//注冊userName1:'',password1:'',password11:'',//登錄userName2:'',password2:''},methods:{reg(){if(this.password1 != this.password11){layer.msg('兩次輸入密碼不一致',{icon:2});return;}let data = {userName: this.userName1,password: this.password1}axios.post('${basePath}/user/register',data).then(r =>{if(r.data.code != '0000'){layer.msg(r.data.message,{icon:2});return;}layer.msg('注冊成功!',{icon:2});});},login(){let data = {userName: this.userName2,password: this.password2}axios.post('${basePath}/user/login',data).then(r =>{if(r.data.code != '0000'){layer.msg(r.data.message,{icon:2});return;}layer.msg('登錄成功!',{icon:1});//登錄成功后,就緩存賬號密碼localStorage.setItem('userName2',this.userName2);localStorage.setItem('password2',this.password2);setTimeout(()=>{location.href="/";},1000)});},//填充緩存的賬號和密碼fillAccount(){let userName2 = localStorage.getItem('userName2');let password2 = localStorage.getItem('password2');if(userName2){this.userName2 = userName2;}if(password2){this.password2 = password2;}if(userName2 && password2){setTimeout(()=>{document.querySelector('.login-title').click();},1000)}}},created(){this.fillAccount();}
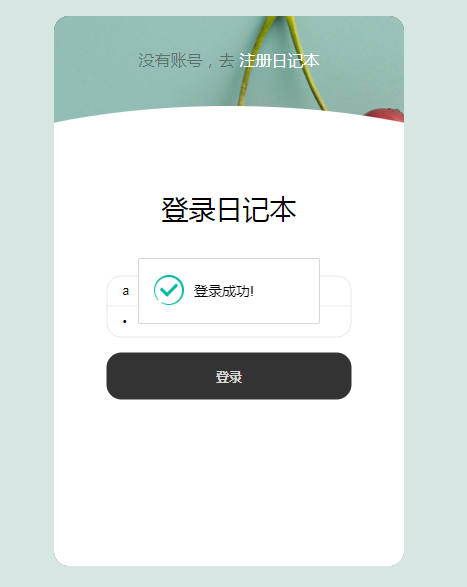
});登錄流程:獲取用戶名和密碼,發送 /user/login?
返回報文格式是這樣的:

?這個格式后臺是怎么返回的,下面會說到。登錄成功后,會把用戶名密碼緩存到本地,緩存技術用的是localStorage。代碼如下:
login(){let data = {userName: this.userName2,password: this.password2}axios.post('${basePath}/user/login',data).then(r =>{if(r.data.code != '0000'){layer.msg(r.data.message,{icon:2});return;}layer.msg('登錄成功!',{icon:1});//登錄成功后,就緩存賬號密碼localStorage.setItem('userName2',this.userName2);localStorage.setItem('password2',this.password2);setTimeout(()=>{location.href="/";},1000)});
},?注冊流程:校驗兩次密碼輸入是否一致,然后發送用戶名和密碼到?/user/register?
代碼如下:
reg(){if(this.password1 != this.password11){layer.msg('兩次輸入密碼不一致',{icon:2});return;}let data = {userName: this.userName1,password: this.password1}axios.post('${basePath}/user/register',data).then(r =>{if(r.data.code != '0000'){layer.msg(r.data.message,{icon:2});return;}layer.msg('注冊成功!',{icon:2});});},如果已經發現緩存中存在用戶名和密碼,就自動填充,并且顯示登陸頁面:
fillAccount(){let userName2 = localStorage.getItem('userName2');let password2 = localStorage.getItem('password2');if(userName2){this.userName2 = userName2;}if(password2){this.password2 = password2;}if(userName2 && password2){setTimeout(()=>{document.querySelector('.login-title').click();},1000)}
}
如果你已經登錄過,那就會看到一個向上滑動的效果,然后系統會自動填充用戶名和密碼。

OK,以上就是前端的邏輯了。
接下來,我們需要做一點準備工作。代碼有點多,我們一個個來看。
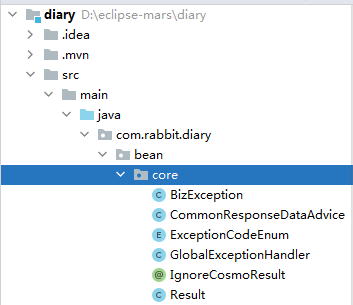
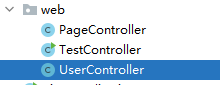
創建上圖所示核心包,位置:
com.rabbit.diary.bean.core
?這是我們系統自定義的業務異常類,所有業務上的報錯,比如【用戶名密碼錯誤】之類的,我們就需要拋出這個異常。
package com.rabbit.diary.bean.core;/*** 業務異常* biz是business的縮寫** @author sunting* @see ExceptionCodeEnum*/
public class BizException extends RuntimeException {private ExceptionCodeEnum error;/*** 構造器,有時我們需要將第三方異常轉為自定義異常拋出,但又不想丟失原來的異常信息,此時可以傳入cause** @param error* @param cause*/public BizException(ExceptionCodeEnum error, Throwable cause) {super(cause);this.error = error;}/*** 構造器,只傳入錯誤枚舉** @param error*/public BizException(ExceptionCodeEnum error) {this.error = error;}public ExceptionCodeEnum getError() {return error;}public void setError(ExceptionCodeEnum error) {this.error = error;}}作用是捕獲異常,當發生異常的時候,就會進入對應的handler。
package com.rabbit.diary.bean.core;import cn.dev33.satoken.exception.NotLoginException;
import org.springframework.web.bind.annotation.ExceptionHandler;
import org.springframework.web.bind.annotation.RestControllerAdvice;/*** 全局異常處理* 一般來說,全局異常處理只是一種兜底的異常處理策略,也就是說提倡自己處理異常。* 但現在其實很多人都喜歡直接在代碼中拋異常,全部交給@RestControllerAdvice處理*/
@RestControllerAdvice
public class GlobalExceptionHandler {/*** 權限異常 (注意,參數一定要是需要捕獲的異常,否則進不來)* @param* @return*/@ExceptionHandler(NotLoginException.class)public com.rabbit.diary.bean.core.Result<com.rabbit.diary.bean.core.ExceptionCodeEnum> handleNotLoginException(NotLoginException bizException) {return com.rabbit.diary.bean.core.Result.error(com.rabbit.diary.bean.core.ExceptionCodeEnum.NEED_LOGIN,bizException.getMessage());}/*** 業務異常(需要主動拋出)** @param* @return*/@ExceptionHandler(com.rabbit.diary.bean.core.BizException.class)public com.rabbit.diary.bean.core.Result<com.rabbit.diary.bean.core.ExceptionCodeEnum> handleBizException(com.rabbit.diary.bean.core.BizException bizException) {return com.rabbit.diary.bean.core.Result.error(bizException.getError());}/*** 運行時異常** @param e* @return*/@ExceptionHandler(RuntimeException.class)public com.rabbit.diary.bean.core.Result<com.rabbit.diary.bean.core.ExceptionCodeEnum> handleRunTimeException(RuntimeException e) {return com.rabbit.diary.bean.core.Result.error(com.rabbit.diary.bean.core.ExceptionCodeEnum.ERROR);}}package com.rabbit.diary.bean.core;/*** 通用異常枚舉* @author Administrator**/
public enum ExceptionCodeEnum {SUCCESS("0000","返回成功!"),ERROR("1111","與服務方通訊失敗,請聯系管理員!"),NEED_LOGIN("9999", "用戶未登錄!"),ERROR_PARAM("1000", "參數送錯了!"),EMPTY_PARAM("2000", "參數為空!"),;private String code;private String desc;private ExceptionCodeEnum(String code, String desc) {this.code = code;this.desc = desc;}public String getCode() {return code;}public void setCode(String code) {this.code = code;}public String getDesc() {return desc;}//為了封裝自定義信息,做特殊處理public ExceptionCodeEnum setDesc(String desc) {this.desc = desc;return this;}}
作用是設置通用的返回,以后在RestController里面寫方法,就不需要專門設置返回結果了。
/*** 統一封賬響應結果* @author Administrator**/
@RestControllerAdvice
public class CommonResponseDataAdvice implements ResponseBodyAdvice<Object> {@Overridepublic boolean supports(MethodParameter methodParameter, Class<? extends HttpMessageConverter<?>> aClass) {// 標注了@RestController,且類及方法上都沒有標注@IgnoreCosmoResult的方法才進行包裝return methodParameter.getDeclaringClass().isAnnotationPresent(RestController.class)&& !methodParameter.getDeclaringClass().isAnnotationPresent(com.rabbit.diary.bean.core.IgnoreCosmoResult.class)&& !methodParameter.getMethod().isAnnotationPresent(com.rabbit.diary.bean.core.IgnoreCosmoResult.class);}@Overridepublic Object beforeBodyWrite(Object o,MethodParameter methodParameter,MediaType mediaType,Class<? extends HttpMessageConverter<?>> aClass,ServerHttpRequest serverHttpRequest,ServerHttpResponse serverHttpResponse) {// 已經包裝過的,不再重復包裝if (o instanceof com.rabbit.diary.bean.core.Result) {return o;}// 改一行代碼即可:把Object返回值用Result封裝return com.rabbit.diary.bean.core.Result.success(o);}
}和上一個類配套使用,如果有的方法或者類不希望被統一封裝,就加上這個注解。
/*** 如果有的方法不希望被統一封裝結果,就用這個注解* @author Administrator**/
@Retention(RetentionPolicy.RUNTIME)
@Target({ElementType.TYPE, ElementType.METHOD})
public @interface IgnoreCosmoResult {}
3.1.6?Result 通用返回結果
public class Result<T> implements Serializable{private String code;private String message;private T data;private Result(String code, String message, T data) {this.code = code;this.message = message;this.data = data;}private Result(String code, String message) {this.code = code;this.message = message;this.data = null;}/*** 帶數據成功返回** @param data* @param <T>* @return*/public static <T> Result<T> success(T data) {return new Result<>(ExceptionCodeEnum.SUCCESS.getCode(), ExceptionCodeEnum.SUCCESS.getDesc(), data);}/*** 不帶數據成功返回** @return*/public static <T> Result<T> success() {return success(null);}/*** 通用錯誤返回** @param exceptionCodeEnum* @return*/public static <T> Result<T> error(ExceptionCodeEnum exceptionCodeEnum) {return new Result<>(exceptionCodeEnum.getCode(), exceptionCodeEnum.getDesc());}/*** 通用錯誤返回** @param exceptionCodeEnum* @param msg* @return*/public static <T> Result<T> error(ExceptionCodeEnum exceptionCodeEnum, String msg) {return new Result<>(exceptionCodeEnum.getCode(), msg);}/*** 通用錯誤返回** @param exceptionCodeEnum* @param data* @param <T>* @return*/public static <T> Result<T> error(ExceptionCodeEnum exceptionCodeEnum, T data) {return new Result<>(exceptionCodeEnum.getCode(), exceptionCodeEnum.getDesc(), data);}public String getCode() {return code;}public void setCode(String code) {this.code = code;}public String getMessage() {return message;}public void setMessage(String message) {this.message = message;}public T getData() {return data;}public void setData(T data) {this.data = data;}}以上6個類的作用很大,幫我們解決了編寫Controller方法的數據返回問題,和異常拋出的問題。有了他們,可以極大地方便我們寫后面的代碼。
在第一小節,我們已經建好了表,接下來我們需要做一些Java后端的工作。首先是配置mybatis-plus:
pom.xml增加依賴
<!-- mybatis plus 支持 -->
<dependency><groupId>com.baomidou</groupId><artifactId>mybatis-plus-boot-starter</artifactId><version>3.3.1.tmp</version>
</dependency>
application.yml配置myabtis
mybatis-plus:mapper-locations: classpath:mybatis/*.xmltype-aliases-package: com.rabbit.diary.bean注意就是配置xml文件的存放位置,和JavaBean的路徑,JavaBean就是和數據庫表對應的類。
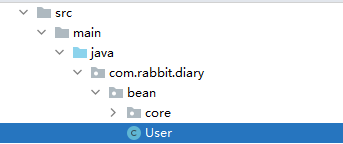
User.java編寫
@TableName("user_base")
@Data
@Service
public class User {@TableId(type = IdType.ASSIGN_UUID)private Long uid;private Integer userRole;private Integer registerSource;private String userName;private String password;private String nickName;private Integer gender;private String birthday;private String signature;private String mobile;private String mobileBindTime;private String email;private String emailBindTime;private String face;private String face200;private String srcface;private String createTime;private String updateTime;}
我用了lombok,這個需要安裝對應的idea插件,和maven依賴,當然你也可以選擇手動生成get,set方法。
lombok依賴:
<dependency><groupId>org.projectlombok</groupId><artifactId>lombok</artifactId><version>1.18.16</version>
</dependency>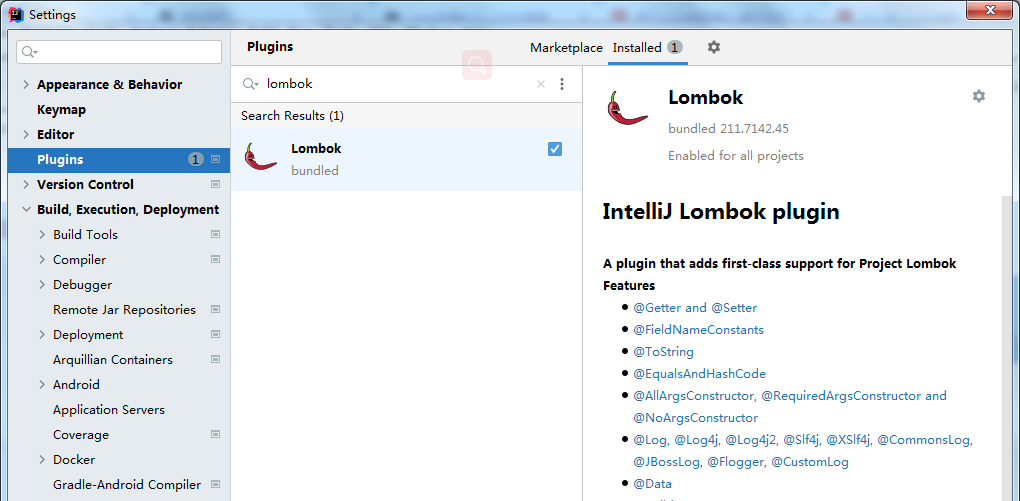
因為使用了mybatis-plus,我們大部分情況, 其實是不需要再手動編寫xml了。
創建包:com.rabbit.diary.dao
編寫UserMapper.java
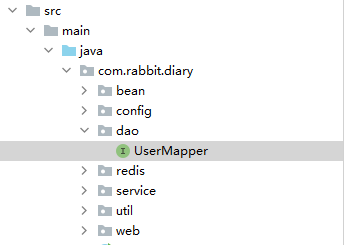
package com.rabbit.diary.dao;import com.baomidou.mybatisplus.core.mapper.BaseMapper;
import com.rabbit.diary.bean.User;
import org.apache.ibatis.annotations.Mapper;@Mapper
public interface UserMapper extends BaseMapper<User> {
}
?這樣就有基本的增刪改查方法了。
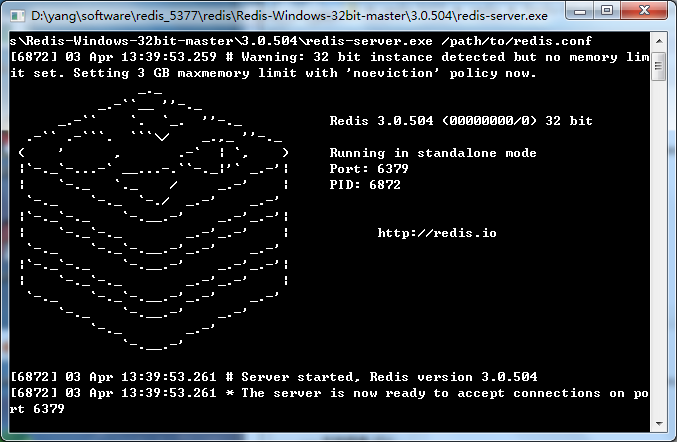
上面已經說過,為了應對分庫分表的情況(雖然這個項目用不到哈),我們將采用redis的方式。redis大家可以自行去百度下載windows版的,安裝很方便。
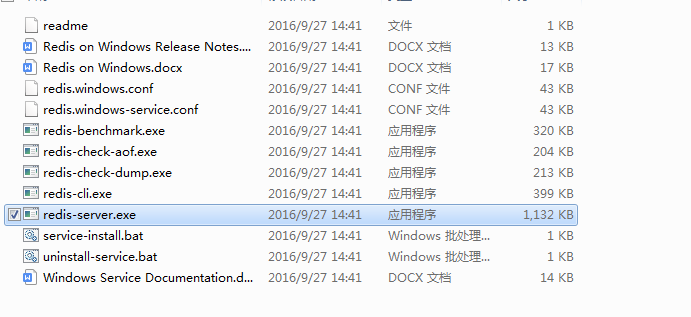 雙擊這個exe就可以打開了。
增加maven依賴:
<dependency><groupId>org.springframework.boot</groupId><artifactId>spring-boot-starter-data-redis</artifactId>
</dependency>
springboot有對應的starter,引入了就行。
然后是application.yml配置
spring:redis:host: 127.0.0.1port: 6379password:jedis:pool:max-active: 8max-wait: -1max-idle: 500min-idle: 0lettuce:shutdown-timeout: 0timeout: 2s注意是放在spring節點下,和mvc,datasource節點是同級的。如果還是不對,請下載源碼自行比較。一般而言,我們剛下載的redis是沒有密碼的。
redis輔助工具類:
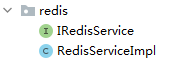
IRedisService
public interface IRedisService {// 加入元素void setValue(String key, Map<String, Object> value);// 加入元素void setValue(String key, String value);// 加入元素void setValue(String key, Object value);// 獲取元素Object getMapValue(String key);// 獲取元素Object getValue(String key);
}
RedisServiceImpl
package com.rabbit.diary.redis;import com.rabbit.diary.util.SpringUtil;
import org.springframework.beans.factory.annotation.Autowired;
import org.springframework.data.redis.core.RedisTemplate;
import org.springframework.data.redis.core.StringRedisTemplate;
import org.springframework.data.redis.core.ValueOperations;
import org.springframework.data.redis.support.atomic.RedisAtomicLong;
import org.springframework.stereotype.Service;import java.util.Map;
import java.util.concurrent.TimeUnit;@Service
public class RedisServiceImpl implements IRedisService {@Autowiredprivate StringRedisTemplate stringRedisTemplate;@Autowiredprivate RedisTemplate redisTemplate;/*** @Description: 獲取自增長值 (每調用1次,ID自增1)* @param key key* @return*/public  Long getIncr(String key) {RedisAtomicLong entityIdCounter = new RedisAtomicLong(key, redisTemplate.getConnectionFactory());Long increment = entityIdCounter.getAndIncrement();//entityIdCounter.expire(0, TimeUnit.SECONDS);return increment;}/*** @Description: 初始化自增長值* @param key key* @param value 當前值*/public void setIncr(String key, int value) {RedisAtomicLong counter = new RedisAtomicLong(key, redisTemplate.getConnectionFactory());counter.set(value);//counter.expire(0, TimeUnit.SECONDS);}@Overridepublic void setValue(String key, Map<String, Object> value) {ValueOperations<String, Object> vo = redisTemplate.opsForValue();vo.set(key, value);redisTemplate.expire(key, 1, TimeUnit.HOURS); // 這里指的是1小時后失效}@Overridepublic Object getValue(String key) {ValueOperations<String, String> vo = redisTemplate.opsForValue();return vo.get(key);}@Overridepublic void setValue(String key, String value) {ValueOperations<String, Object> vo = redisTemplate.opsForValue();vo.set(key, value);redisTemplate.expire(key, 1, TimeUnit.HOURS); // 這里指的是1小時后失效}@Overridepublic void setValue(String key, Object value) {ValueOperations<String, Object> vo = redisTemplate.opsForValue();vo.set(key, value);redisTemplate.expire(key, 1, TimeUnit.HOURS); // 這里指的是1小時后失效}@Overridepublic Object getMapValue(String key) {ValueOperations<String, String> vo = redisTemplate.opsForValue();return vo.get(key);}}
其中包含了
getIncr
setIncr
這兩個方法可以用來設置、獲取自增長值。
用戶權限問題是一個系統不可缺少的部分,本項目采用sa-token框架。倒不是我給作者打廣告哈,而是我覺得確實很好用,shiro太重了,我更傾向于選擇sa-token,用我們國人自己的框架。
官網:Sa-Token
引入依賴:
<!-- Sa-Token 權限認證-->
<dependency><groupId>cn.dev33</groupId><artifactId>sa-token-spring-boot-starter</artifactId><version>1.28.0</version>
</dependency>
創建包
com.rabbit.diary.config
編寫
SaTokenConfigure
@Configuration
public class SaTokenConfigure implements WebMvcConfigurer {// 注冊Sa-Token的注解攔截器,打開注解式鑒權功能@Overridepublic void addInterceptors(InterceptorRegistry registry) {// 注冊注解攔截器,并排除不需要注解鑒權的接口地址 (與登錄攔截器無關)registry.addInterceptor(new SaAnnotationInterceptor()).addPathPatterns("/**");}
}
寫這個config是為了開啟sa-token注解。
終于到用戶接口編寫啦,我們已經做了很多的準備工作,這個項目已經初步具備企業級工程化的標準了。很多企業小項目的架構雜亂無章,甚至都沒有這么完備的體系。
用戶服務類,我們采用接口+實現類的方式。
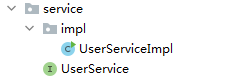
UserService
package com.rabbit.diary.service;import com.rabbit.diary.bean.User;
import org.springframework.stereotype.Service;public interface UserService {User getByUserName(String userName);void save(User user);
}
UserServiceImpl
package com.rabbit.diary.service.impl;import com.baomidou.mybatisplus.core.conditions.query.QueryWrapper;
import com.rabbit.diary.bean.User;
import com.rabbit.diary.dao.UserMapper;
import com.rabbit.diary.redis.RedisServiceImpl;
import com.rabbit.diary.service.UserService;
import org.springframework.beans.factory.annotation.Autowired;
import org.springframework.stereotype.Service;import java.lang.annotation.Annotation;
import java.util.List;@Service
public class UserServiceImpl implements UserService {@AutowiredUserMapper userMapper;@AutowiredRedisServiceImpl redisServiceImpl;/*** 根據用戶名獲取用戶* @param userName* @return*/@Overridepublic User getByUserName(String userName) {List<User> users = userMapper.selectList(new QueryWrapper<User>().eq("user_name", userName));if(users.size() > 0){return users.get(0);}return null;}/*** 保存用戶* @param user*/@Overridepublic void save(User user) {userMapper.insert(user);}}
很簡單吧,就兩個方法。
UserController:
?
package com.rabbit.diary.web;import cn.dev33.satoken.stp.StpUtil;
import cn.hutool.core.date.DateUtil;
import cn.hutool.core.util.StrUtil;
import cn.hutool.crypto.SecureUtil;
import com.rabbit.diary.bean.User;
import com.rabbit.diary.bean.core.BizException;
import com.rabbit.diary.bean.core.ExceptionCodeEnum;
import com.rabbit.diary.bean.core.Result;
import com.rabbit.diary.redis.RedisServiceImpl;
import com.rabbit.diary.service.UserService;
import org.springframework.beans.factory.annotation.Autowired;
import org.springframework.web.bind.annotation.RequestBody;
import org.springframework.web.bind.annotation.RequestMapping;
import org.springframework.web.bind.annotation.RestController;@RestController
@RequestMapping("/user")
public class UserController {@AutowiredUserService userService;@AutowiredRedisServiceImpl redisServiceImpl;String salt = "diary188";@RequestMapping("register")public Result register(@RequestBody User user){if(StrUtil.isEmpty(user.getUserName())){throw new BizException(ExceptionCodeEnum.ERROR_PARAM.setDesc("用戶名不允許為空!"));}if(StrUtil.isEmpty(user.getPassword())){throw new BizException(ExceptionCodeEnum.ERROR_PARAM.setDesc("密碼不允許為空!"));}//檢查用戶名是否重復if(userService.getByUserName(user.getUserName()) != null){throw new BizException(ExceptionCodeEnum.ERROR_PARAM.setDesc("用戶名"+user.getUserName()+"重復!"));}//拼裝userBeanuser.setUid(redisServiceImpl.getIncr("userId")); //redis自增IDuser.setPassword(SecureUtil.md5(user.getPassword() + salt));user.setCreateTime(DateUtil.now());user.setUpdateTime(DateUtil.now());userService.save(user);return Result.success();}@RequestMapping("login")public Result login(@RequestBody User user){User user1 = userService.getByUserName(user.getUserName());if(user1 == null){throw new BizException(ExceptionCodeEnum.ERROR_PARAM.setDesc("不存在的用戶名:" + user.getUserName()));}String password = SecureUtil.md5(user.getPassword() + salt);if(!user1.getPassword().equals(password)){throw new BizException(ExceptionCodeEnum.ERROR_PARAM.setDesc("賬號和密碼不匹配:" + user.getUserName()));}/**登錄維持ID* */StpUtil.login(user1.getUid(),"PC");return Result.success();}}
下面我們挑幾個需要注意的點
01. 如何實現redis自增長ID?
user.setUid(redisServiceImpl.getIncr("userId")); //redis自增ID02.如何保持登錄ID?
StpUtil.login(user1.getUid(),"PC");PageController
@Controller
public class PageController {@RequestMapping("login")public String login(){return "login";}@RequestMapping("/")@SaCheckLoginpublic String index(){return "index";}
}
注意,我們給index加上了saCheckLogin注解,這表示進入這個方法必須得是登錄狀態。
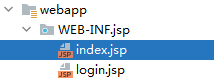
index.jsp是項目首頁
<%@ page contentType="text/html;charset=UTF-8" language="java" %>
<c:set var="basePath" value="${pageContext.request.contextPath}"></c:set>
<html>
<head><title>Title</title><script src="${basePath}/layui/layui.all.js" charset="utf-8"></script><link rel="stylesheet" href="${basePath}/layui/css/layui.css" media="all">
</head>
<body>首頁
</body>
</html>
啟動項目,讓我們訪問:http://localhost/
看到:
{"code":"9999","message":"Token無效:3fd99f78-10aa-4690-bd83-5fae198d1b87","data":null}
?這表示sa-token的配置已經生效了。
現在,我們去注冊幾個賬號:
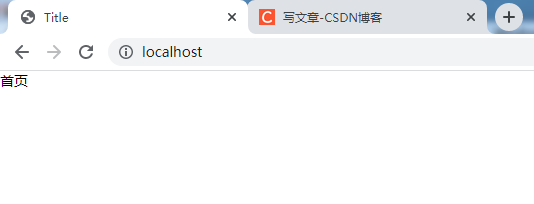
這就順利進入了index.jsp。
關注下方公眾號,回復“日記本”即可。我把每一節的源碼都單獨打包給你準備好了。
版权声明:本站所有资料均为网友推荐收集整理而来,仅供学习和研究交流使用。

工作时间:8:00-18:00
客服电话
电子邮件
admin@qq.com
扫码二维码
获取最新动态